User Management. User Accounts
A User Account is an account associated with a user logon name used by the messaging client to establish a session with the IM server and communicate with other users. A User Account can be added manually from the Management Console, created by the user from the messenger or imported from the Active Directory (LDAP) catalog.
Only users with enabled (active) accounts may connect to the instant messaging server, send/receive messages and files from others. You can disable user accounts on the server or delete them permanently.
Users may modify their own account information stored on the Instant Messaging server (except the IM account name, i.e. Logon name). You can allow fields to be modified in the server options, see the Accounts tab of the Options dialog box.
To switch to the User Account profile page, just find and select the user in the User Management tree in the left pane or double-click the account in the Organizational Units view (the result view).
The result pane displays the user's profile page that contains advanced information about the user, his assigned Messaging Groups, News Messages, pending File Distribution tasks and the user's latest activity (session established with the IM server).
The view also displays charts that show number of both sent and received private, group messages and file transfers by the user per each day for the last 7-day period.
The toolbar contains the following functions you can access, from left to right:

- New — Add a new User Account to the current Organizational Unit.
- Edit — Edit one or multiple selected User Accounts, e.g. information associated with the accounts, location in the OUs tree, state and other fields.
- Move — Move the selected User Accounts to another Organizational Unit in the current tree. This action affects the users' permissions because the users accepts the new settings applied to the new OU.
- Delete — Remove the selected User Accounts from the server. This action also deletes all logged activities and the message and transfer archive of the users.
- Edit OU — Display the current Organizational Unit property dialog box.
- Refresh — Update the user's profile page displayed in the result view.
- Print — Print the user's profile page displayed in the result view.
- Options — Open the Options dialog box in order to change the server settings and look-and-feel options.
- Help — Open the help contents (this file).
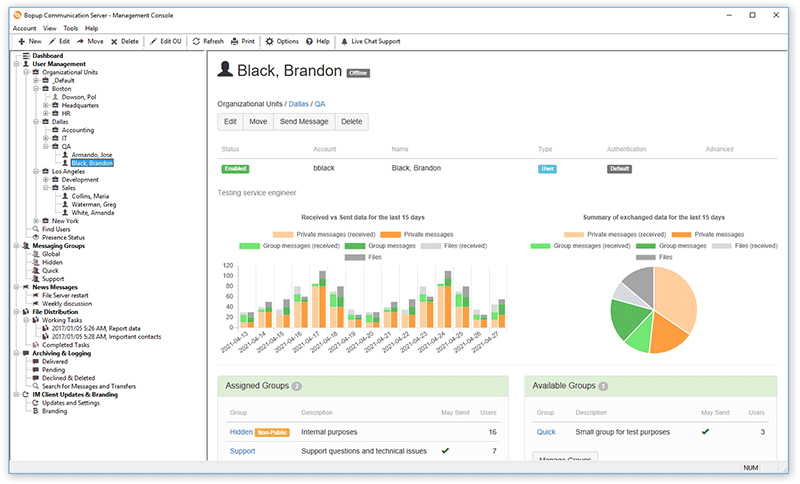 |
| User Account profile page |
You can also use buttons on the profile page to quickly edit, move or delete the User Account.
The Assigned Messaging Groups section of the User Account profile page shows the list of assigned Messaging Groups. Click the Manage Groups button to assign/remove groups for the user.
The Available Messaging Groups list shows Messaging Groups whose accessibility options permit the user to send messages and files to appropriate group. That availability depends on the group settings.
Note that if the user has the Administrator account type, he automatically gets the right to view/send messages and files to all Messaging Groups available on the server even if he is not assigned to the groups directly. Users with Power User account type have the same privileges as regular users but may send urgent instant messages to others.
The Assigned News messages table shows the currently assigned News messages. Click the Manage News button to add/remove News messages for the user.
The Pending File Distribution tasks table shows the currently pending distribution tasks assigned to the user. Click the Manage distribution tasks button to add/remove File Distribution tasks for the user.
The Latest Activity Details section provides information about the latest session on the IM server, the current presence status, the activity duration/time, the version of the IM client software, the source IP address the connection was established from.
 |
Users who have the Administrator account type automatically get the right to view, send messages and files to all active user accounts available on the server. This feature allows administrators and managers to send messages and files even if their Organizational Unit permissions restrict the ability to view some users from other OUs. |
Adding a new User Account
To create a new User Account on the server, select and right-click the necessary Organizational Unit in the
User Management section of the tree and select the "
Add new account..." menu item from the pop-up menu. Or select the "
OU\Add new account..." item from the main menu or use the

button on the toolbar. This will open the
Add User Account Wizard.
 |
| Welcome to the Add User Account Wizard |
Account Location
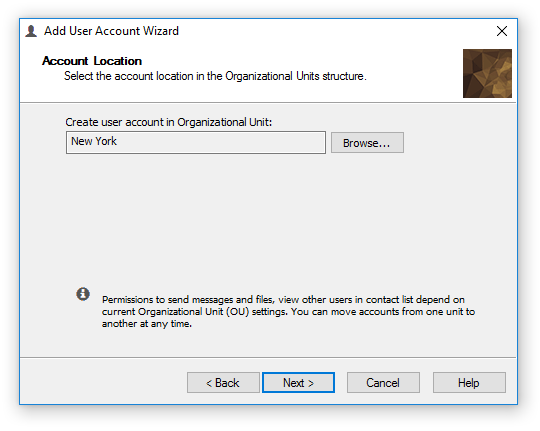 |
| Select the account location in the Organizational Units tree |
Click Browse... to select a new location for the new User Account. You can also move the User Account at any time later.
General Information
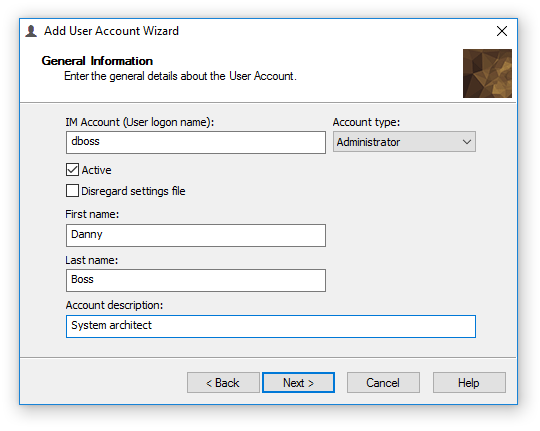 |
| Enter the general details about the User Account |
Use the General information page to enter the user's logon name, i.e. the account name used by the user to log into the Windows and/or Domain network. The first name and last name fields are optional and you may leave them empty.
- "Active" — Enable this option to set the account as active and allow the user to log into the IM network and communicate with others. Otherwise the User Account will be disabled and the user will not be able to start the messenger until you enable the account from the Management Console.
- "Disregard settings file" — Use this option in order to do not distribute the IM client configuration file uploaded on the server to the user. This will allow the user to access and change all messenger settings if the account privileges and roles require that.
Click the
Account type drop-box to select an account type for the user. Choose one from the following types:
- "User" — This is a basic account type. It's permissions to send personal messages and view other users are based on permissions of parent Organizational Unit (OU) and permissions to send group messages are based on each group permissions. This account type cannot send urgent messages to other users and on assigned groups.
- "Power User" — This account type operates like User account type above but sending urgent messages to other users and on assigned groups are permitted.
- "Administrator" — Select this account type to grant the user administrative privileges on the IM server. Administrators have the right to view, send messages and files to all users and Messaging Groups located on the IM server and also send urgent messages. This account type is designed for administrators and managers who need to have more rights than regular User and Power User accounts.
See the following
User Account Type Comparison table that shows permissions and rights for each account type.
Click
Next to proceed to the next page of the wizard and enter optional and additional information about the account, such as its title, contact details, etc.
Personal Authentication
 |
| Change the authentication method for the account personally |
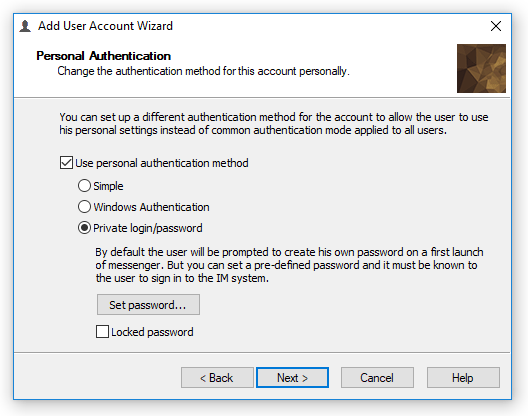
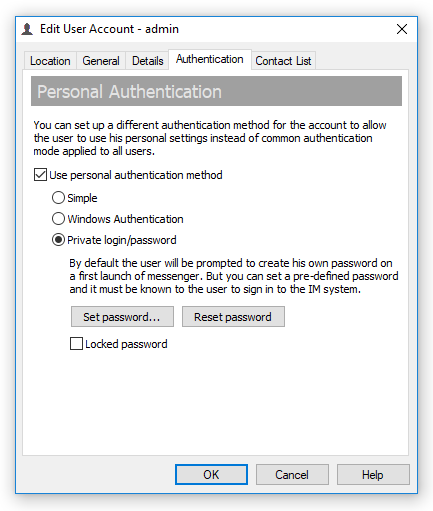
You can set up a personal authentication method for the account to allow the user to use his personal settings instead of common authentication mode applied to all users.
Select the "Use personal authentication method" check box on the Personal Authentication page to override default authentication mode enabled on the communication server for this user. Then choose one from the available methods:
- "Simple" — This method only matches user's Windows logon ID and account name on the communication server. No any other authorization is used.
- "Windows Authentication" — The communication server authenticates the user using standard Windows Authentication (SSPI). This is the most preferred mode for domain networks.
- "Private login/password" — Use pair of private login name (IM account name) and password to authenticate the user on the communication server.
|
You can use personal authentication to support connections to the IM server outside your corporate LAN/WAN. For example, you have the Windows Authentication mode enabled on the communication server to accept users on the domain network and want to get some user connected from his home computer, etc. |
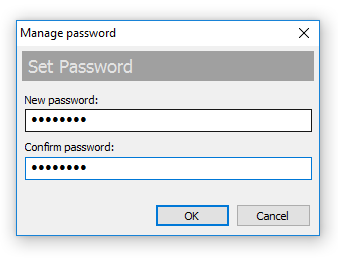
If Private login/password authentication mode is selected as personal authentication for the user or if Private login/password is set as a common authentication mode in the server options you can set a pre-defined password that must be used by the user on his first sign in to the IM network. Otherwise the user will be prompted by the messenger software to create and set his own personal password on a first startup of the IM client. Click Set password... button to define a user's password. Check "Locked password" option to prevent the user from changing his own password by himself in the messenger application.
 |
| Set password for a user |
Please note that entered password must be at least 4 symbols of length. Maximum supported length of the entered password is 64 symbols.
After you close the wizard the new User Account will appear on the left according to its location in the OUs tree.
Editing an existing User Account
To edit an existing User Account, select and right-click it in the Organizational Units tree or in the result view and select the "
Edit" menu item from the pop-up menu. You can also select the "
Account\Edit..." item from the main menu or use the

button on the toolbar.
It is possible to edit user accounts in bulk, i.e. modify several accounts simultaneously and change their type, personal authentication and other fields from a single property dialog box. In this case select multple user accounts under Organizational Unit or in Find Users view and use the "
Edit" menu item from the pop-up menu. You can also select the "
Account\Edit..." item from the main menu or use the
button on the toolbar.
Location
 |
| Change the account location in the OUs tree |
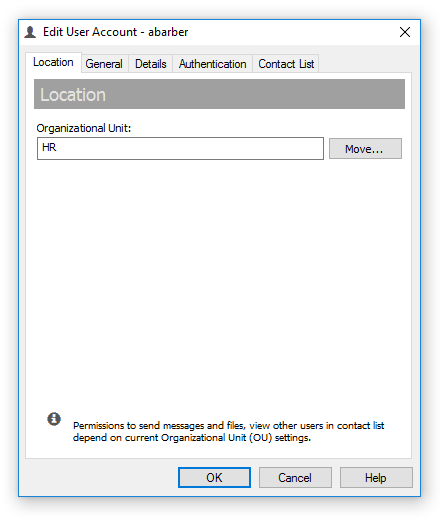
You can use the Location page to change the location and move the user account to another Organizational Unit. Click the Move... button to move the account to another place in your Organizational Units structure.
|
When you move a user account, you change its permissions to view, send messages and files to other users because the permissions of the new OU are applied to the account. So if the "Automatically rebuild users' Contact Lists from a list of available users" check box on the Accounts tab of the options dialog is turned off, then other users may receive notifications that their Contact Lists have minor changes and some users are now available or moved. |
General
 |
| Edit the account, its name, state and type |
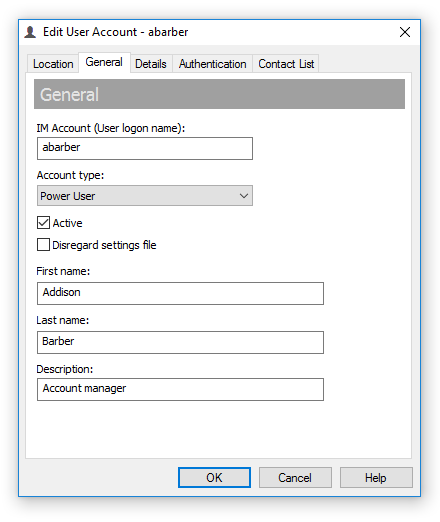
The General tab of the User Account property dialog box allows you to change the account name, edit the first and last names, disable/enable the account on the IM server and change the account type.
- "Active" — Enable this option to set the account as active and allow the user to log into the IM network and communicate with others. Otherwise the User Account will be disabled and the user will not be able to start the messenger until you enable the account from the Management Console.
- "Disregard settings file" — Use this option in order to do not distribute the IM client configuration file uploaded on the server to the user. This will allow the user to access and change all messenger settings if the account privileges and roles require that.
Click the
Account type drop-box to select an account type for the user. Choose one from the following types:
- "User" — This is a basic account type. It's permissions to send personal messages and view other users are based on permissions of parent Organizational Unit (OU) and permissions to send group messages are based on each group permissions. This account type cannot send urgent messages to other users and on assigned groups.
- "Power User" — This account type operates like User account type above but sending urgent messages to other users and on assigned groups are permitted.
- "Administrator" — Select this account type to grant the user administrative privileges on the IM server. Administrators have the right to view, send messages and files to all users and Messaging Groups located on the IM server and also send urgent messages. This account type is designed for administrators and managers who need to have more rights than regular User and Power User accounts.
See the following
User Account Type Comparison table that shows permissions and rights for each account type.
You can use the Details tab to edit the department, title and contact details of the user account.
Personal Authentication
 |
| Change the authentication method for the account personally |
You can set up a personal authentication method for the account to allow the user to use his personal settings instead of common authentication mode applied to all users.
Select the "Use personal authentication method" check box on the Personal Authentication tab to override default authentication mode enabled on the communication server for this user. Then choose one from the available methods:
- "Simple" — This method only matches user's Windows logon ID and account name on the communication server. No any other authorization is used.
- "Windows Authentication" — The communication server authenticates the user using standard Windows Authentication (SSPI). This is the most preferred mode for domain networks.
- "Private login/password" — Use pair of private login name (IM account name) and password to authenticate the user on the communication server.
|
You can use personal authentication to support connections to the IM server outside your corporate LAN/WAN. For example, you have the Windows Authentication mode enabled on the communication server to accept users on the domain network and want to get some user connected from his home computer, etc. |
If Private login/password authentication mode is enabled as personal authentication for the user or if Private login/password is set as a common authentication mode in the server options then it is possible to set/override current user's password that is used by the user to sign in to the IM network and also to reset the password in order to force the user to create his own on the next startup of the messenger software. Click Set password... button to define or change user's password. Check "Locked password" option to prevent the user from changing his own password by himself in the messenger application.
|
| Set or override password for a user |
Please note that entered password must be at least 4 symbols of length. Maximum supported length of the entered password is 64 symbols.
Click Reset password button to reset the user password. This action forces the user to create a new password from the IM client software and appropriate notification is immediately sent to the user. If the user is currently offline (not connected to the IM server) the server automatically sends the notification when the user enters to the messaging network.
Contact List
 |
| Tune and build custom buddy list for a user |
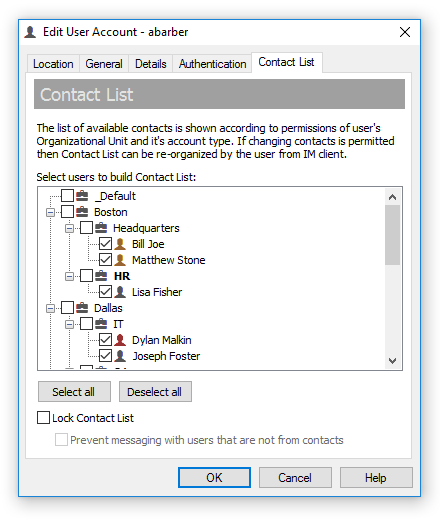
It is possible to manage user's contacts and tune the buddy list according various permissions and organization structure. By default, users are able organize their Contact Lists from instant messaging clients and the list of available contacts is controlled via Organizational Unit permissions globally for all users in the same unit.
Use Select all and Deselect all buttons to mark all available users or remove every one from the contacts. Selecting Organizational Unit in the structure will mark all child user accounts as selected.
Initially the list structure shows users and OUs that are available to a user according his Organizational Unit permissions. Users that are currently exist in user's contacts have a checked box. Clear or mark another users to remove/add contacts to user's buddy list. Please note that the structure shows all available users on the communication server for accounts with Administrator type.
The "Lock Contact List" check box allows to keep the contacts unchanged when new users are added, moved or deleted on the IM server and even the "Automatically rebuild users' Contact Lists from a list of available users when some accounts have been added, moved or deleted on the server" option on the Contact Lists tab of the Options dialog box is checked. This option also restricts and blocks the contacts from modifications by a user himself from instant messaging client.
The "Prevent messaging with users that are not from contacts" option restricts sending instant messages to users that are not included to user's Contact List and when it is locked. This restriction is also applied even recipient is accessible and visible to a user due it's Organizational Unit permissions settings but is not added to user's contacts.
|
Managing contacts from the console would be a useful feature when changing Contact Lists is prohibited on the IM server through "Prevent users from changing their Contact Lists" option on the Contact Lists tab of the Options dialog box. |
Deleting and disabling User Accounts
To delete or disable an existing User Account, select and right-click it in the Organizational Units tree or in the result view and select the "
Delete" menu item from the pop-up menu. You can also select the "
Account\Delete" item from the main menu or use the

button on the toolbar.
|
You can delete or disable multiple accounts at one time. Press Ctrl key to select several accounts on the Organizational Unit view. |
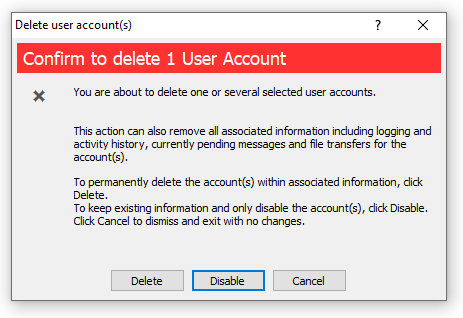 |
| Delete or disable the User Account |
You should confirm the deletion of a User Account. By default, the account will be disabled and moved to the _Default Organizational Unit for its message, file transfer and session history to be kept. To delete the account and all its history from the server, click the Delete button.
|
Since this action deletes or disables a user account, it affects other users' permissions, such as visibility in their Contact Lists. So if the "Automatically rebuild users' Contact Lists from a list of available users when some accounts have been added, moved or deleted on the server" check box on the Contact Lists tab of the options dialog is turned off, then other users receive an automatic notification from the IM server that their contact lists have been modified because some users have been deleted or disabled on the server. |
User Account Type Comparison
The following table shows permissions and right for all 3 account types available on Bopup Communication Server:
User,
Power User and
Administrator.
| Operation / Account Type |
 User User |
 Power User Power User |
 Administrator Administrator |
View and send messages to other users
(according account's OU permissions) |  | | |
Send messages to assigned groups
(according permissions) | | | |
| Send files and folders | | | |
| Send files and folders with advanced options |  | | |
| Send urgent messages | | | |
| Create own MyGroups | | | |
| View and send messages to all users on the IM server | | | |
| View and send messages to all groups on the IM server | | | |