Messaging Groups. Manage groups
To switch to the Messaging Group profile page, just find and select the group in the Messaging Groups tree in the left pane or double-click the group name in the Messaging Groups list (the result view).
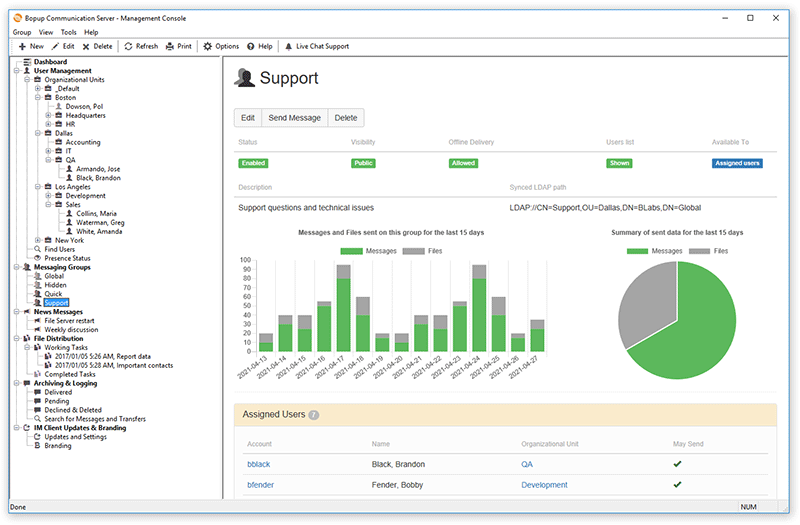
The result view displays details about the group and the list of assigned users. It also displays charts that show number of messages and file transfers delivered on the group per each day for the last 7-day period.
The toolbar contains the following functions you can access, from left to right:

- New — Add a new Messaging Group.
- Edit — Edit the selected Messaging Group, manage the assigned users and their permissions to send messages and files, enable/disable the group.
- Delete — Delete the selected Messaging Group from the server. This action also deletes the entire message and transfer archive for the group.
- Refresh — Update the group profile page displayed in the result view.
- Print — Print the group profile page displayed in the result view.
- Options — Open the Options dialog box to change the server settings and look-and-feel options.
- Help — Display the help contents.
 |
| Messaging Group profile page |
You can use buttons on the profile page to quickly edit and delete the Messaging Group.
 |
Users with the Administrative account type automatically get the right to view and send messages and files to all public Messaging Groups available on the server. This feature allows administrators and managers to send messages and files to the group even if they are not currently assigned to groups. |
Adding a new Messaging Group
To create a new Messaging Group on the server, select the
Messaging Groups view in the tree and select the "
New..." menu item from the pop-up menu. You can also select the "
Group\New..." item from the main menu or use the

button on the toolbar. It will open the
Add Messaging Group Wizard.
 |
| Welcome to the Add Messaging Group Wizard |
General Information
Use the next dialog box to enter the name of the Messaging Group, its short description, set public property and enable offline delivery of group messages. Both the name and the description of a public group are visible in IM clients to all assigned users and administrators. The group name should be unique on the IM server, so you cannot enter a name that already exists in the groups list.
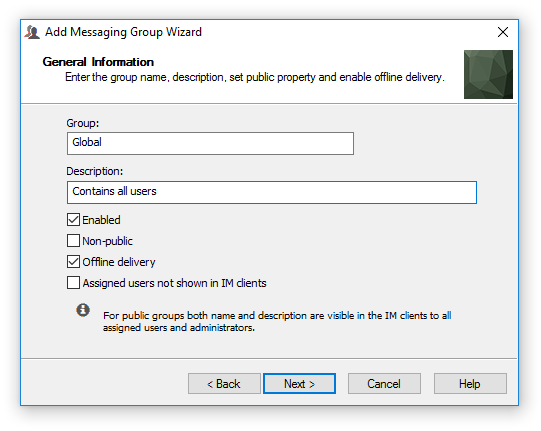 |
| Enter the group name and description |
- "Enabled" — Check this option to automatically enable the Messaging Group after you create it. Otherwise the group will be added as inactive and you will have to enable it later.
- "Non-public" — Set this property to create the group as non-public and not visible to users. You can change the public state later.
- "Offline Delivery" — Activate this checkbox if you want to enable offline delivery of group messages if some from users are not available. Sometimes it is not necessary to save the group message as offline if it requires only immediate attention (*).
(*) — Please note that in order to use this option you need to have to check the "Save group messages as offline if the recipient is not available" checkbox on the Logging tab in the Options dialog box. Otherwise this option will be grayed and unchecked.
- "Assigned users not shown in IM clients" — Enable this option in order to hide a list of assigned users shown under the group in end-user messenger software. In this case the group cannot be expanded to show users.
 |
When the group is disabled it does contribute in News Messages. For example, the group is assigned to the News message. When the news is sending and assigned group is disabled then messages are not proceed to users from that group. |
Assigned Users and Permissions
Manage users and their permissions to send instant messages and files to the group.
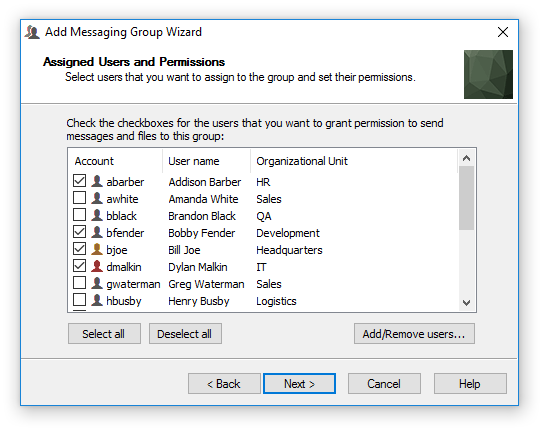 |
| Assign users and manage their permissions |
Click the Add/Remove users... to open the Manage group users dialog box.
Managing group users
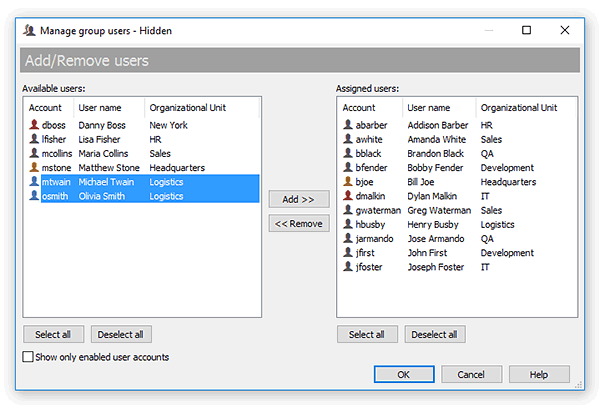 |
| Add/remove users from the Messaging Group |
Use "Show only enabled User Accounts" to display only enabled (active) accounts in the Available and Assigned lists. Use the Add >> and << Remove buttons to move users between lists. You can also double-click on a user to move it between the lists. Click OK to apply the changes.
Then use the list on the wizard page to select those users who should have permissions to send messages and files to the group. Note that Administrative accounts may send group messages and files no matter whether they are assigned to the group. Use the Select all and Deselect all buttons to set/remove permissions for all users in the group.
Assign users by IP range
You can also add users to the group dynamically by entering multiple ranges of IP addresses from which users connect. In this case the group will be dynamically assigned to users from specified IP ranges regardless user's account name.
Click Add... button to enter a new IP range. To remove range select it in the list click Remove button.
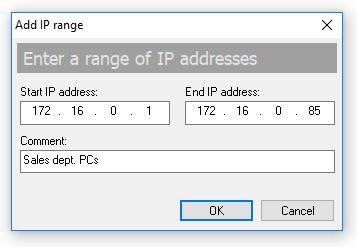 |
| Enter a new range of IP addresses |
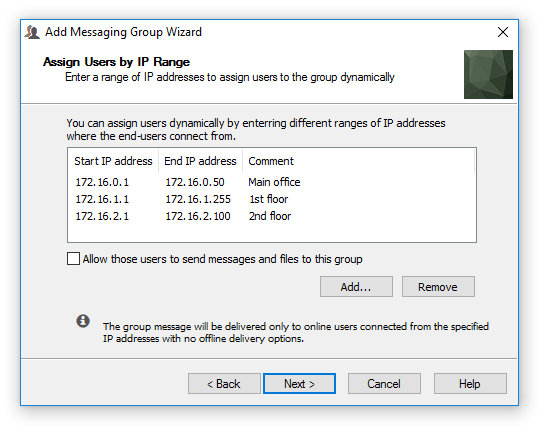 |
| Assign users dynamically by IP addresses |
Use the "Allow those users to send messages and files to this group" to permit users that are assigned by IP ranges to initiate sending messages and files. Otherwise the group will be assigned to those users with read-only permission.
|
Group messages are delivered only to online users that connect from the specified IP ranges. Since those users are assigned dynamically then group messages cannot be saved for them as offline. |
Accessibility Options
Allow non-assigned users to send messages and files to the group.
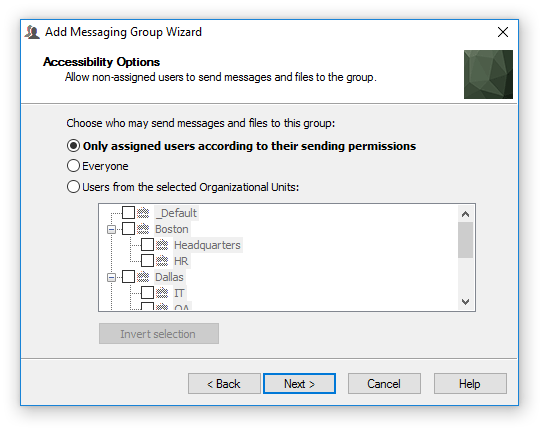 |
| Choose who may send messages to the group |
There are 3 accessibility options available:
- Only assigned users according to their sending permissions — This is the default accessibility option. Only assigned users that have sending permissions may send messages and files to this group.
- Everyone — Select this option to make the group Public. Everyone connected to the server will be able to send messages and files to this group. Note that this option overrides permission for users that are assigned directly or dynamically by IP range.
- Users from the selected Organizational Units — This option allows you to specify the limited number of users by selecting Organizational Units in the tree. Only assigned users and users from the selected OUs will be able to send messages and files to this group.
|
Accessibility settings override sending/receive-only permissions for assigned users. For example, if an assigned user has no permission to send group messages and files, but the accessibility of the group permits sending messages and files to everyone or to users from the specified Organizational Units where the user is located, he automatically gets the permission to send messages and files to the group. |
Click
Next to go to the Finish dialog box and close the wizard.
Editing an existing Messaging Group
To edit an existing Messaging Group and its assigned users, select and right-click it in the
Messaging Groups view or in the result view and select the "
Edit" menu item from the pop-up menu. You can also select the "
Group\Edit..." item from the main menu or use the

button on the toolbar.
General
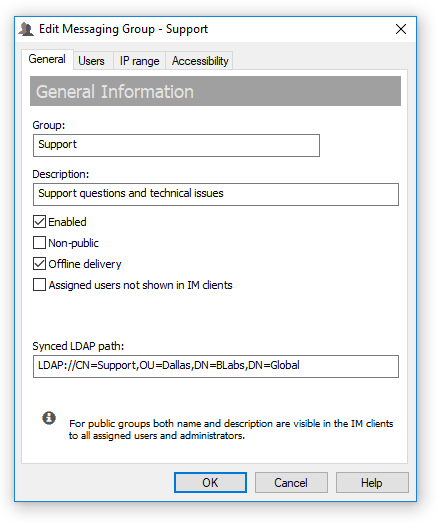 |
| Change the group name, description and state |
If you change the name, you should specify a unique name among your Messaging Groups because you cannot have two or more groups with the same name.
- "Enabled" — Use this option to enable the group.
- "Non-public" — Check this property to set the group as non-public and not visible to users. Otherwise when you uncheck this option the group will be available for sending and will be shown in the messengers.
- "Offline Delivery" — Activate this checkbox if you want to enable offline delivery of group messages if some from users are not available. Sometimes it is not necessary to save the group message as offline if it requires only immediate attention.
- "Assigned users not shown in IM clients" — Enable this option in order to hide a list of assigned users shown under the group in end-user messenger software. In this case the group cannot be expanded to show users.
"
Synced LDAP path" field displays an associated path to Active Directory group object when a group is imported using
Active Directory Import Wizard or
BCSCmd.exe command line tool. This path is used by the IM server to properly assign newly added users and update assignment to the group for existing user accounts during next update and synchronize processes of the Active Directory import procedure. It matches pathes of the messaging group and LDAP group object to find an association in cases when a group is renamed on the communication server. This text field is a read-only since it is designed for informational purposes only.
|
When the group is disabled it does contribute in News Messages. For example, the group is assigned to the News message. When the news is sending and assigned group is disabled then messages are not proceed to users from that group. |
Users
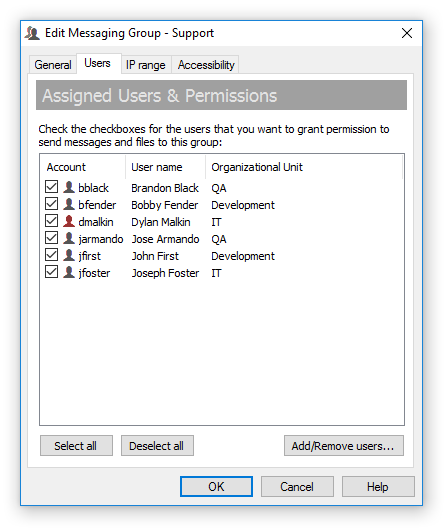 |
| Edit the assigned users list, change the permissions |
Click the Add/Remove users... to manage users that are assigned to the group or add new users. To manage user permissions to send messages and files, select the checkbox next to the account in the list. Use the Select all and Deselect all buttons to set or clear sending permissions for all users in the Messaging Group.
IP range
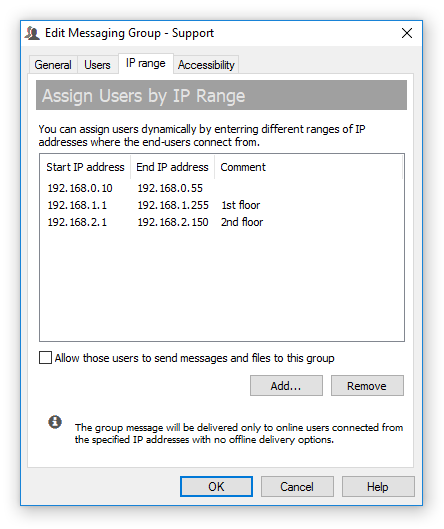 |
| Assign users dynamically by IP addresses |
Click Add... button to enter a new IP range. To remove range select it in the list click Remove button.
|
| Enter a new range of IP addresses |
Check the "Allow those users to send messages and files to this group" to permit users that are assigned by IP ranges to initiate sending messages and files. Otherwise the group will be assigned to those users with read-only permission.
|
Group messages are delivered only to online users that connect from the specified IP ranges. Since those users are assigned dynamically then group messages cannot be saved for them as offline. |
Accessibility
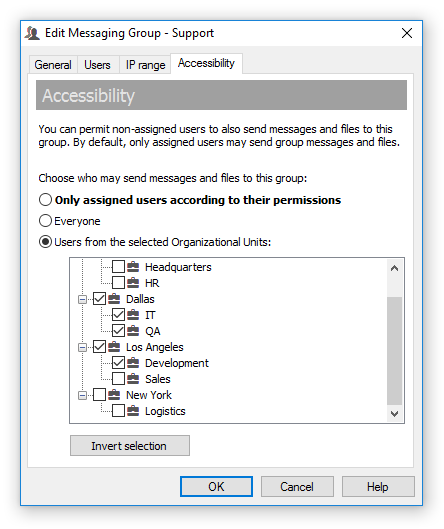 |
| Manage the accessibility of the Messaging Group |
Choose one from the following available accessibility options:
- Only assigned users according to their sending permissions — This is the default accessibility option. Only assigned users that have sending permission may send messages and files to this group.
- Everyone — Select this option to make the group Public. Everyone connected to the server will be able to send messages and files to this group. Note that this option overrides permission for users that are assigned directly or dynamically by IP range.
- Users from the selected Organizational Units — This option allows you to specify the limited number of users by selecting Organizational Units in the tree list. Only assigned users and users from the selected OUs will be able to send messages and files to this group.
Deleting Messaging Groups
To delete existing Messaging Group select and right-click on it from the
Messaging Groups view or from the result view, then choose "
Delete" menu item from the pop-up menu. You can also select "
Group\Delete" item from the main menu or use

button on the toolbar.
 |
| Delete or disable the Messaging Group |
Click Delete to delete the group and remove the associated message and file transfer history from the server, i.e. all sent, received and pending messages and files to the group. Otherwise select Disable to disable the group and keep all logs & archives.